A Comprehensive Beginner’s Guide to Essential DIY Woodworking Tools
Woodworking is a craft that appeals to a diverse range of individuals.
For some, it’s a therapeutic way to relieve stress and nurture their creative instincts, while for others, it evolves into a lucrative profession, allowing them to craft coveted furniture pieces.
Whether you’re a master craftsperson or a novice just beginning your journey in the world of woodworking, one thing is certain: you need the right tools to bring your ideas to life.
This guide will provide a thorough exploration of the must-have woodworking tools for beginners.
In summary, the essential woodworking tools for beginners include:
- Hand Saws
- Power Saws
- Planes
- Sanders
- Files
- Hammer
- Mallet
- Drill
- Screw Gun
- Tape Measure
- Square
- Sawhorses
- Workbench
With a plethora of tools available in the market, it’s easy for beginners to feel overwhelmed, leading to the accumulation of expensive equipment that may not be immediately necessary.
However, it’s crucial to start with the basics, allowing you to grasp the fundamental principles of woodworking and develop your skills.
To simplify the process, we can categorize these essential woodworking tools into five primary groups, each serving a specific purpose in your woodworking journey: cutting, finishing, assembly, measurement, and workpiece support.
Let’s delve deeper into each of these categories to help you build a comprehensive understanding of the tools you need.
1. Cutting Tools for Woodworking:
Cutting is where the transformation of raw wood begins.
Whether you’re dealing with hardwoods like oak or softwoods like pine, you’ll need the right saws to shape your materials.
Let’s explore the essential cutting tools for beginners:
a.) Circular Saw: The Swiss Army Knife of Woodworking Tools

A circular saw is a versatile powerhouse that should find a home in every beginner’s toolbox.
While countless brands offer various models, they all share a common feature: a circular blade with sharp teeth that effortlessly cuts through wood.
Circular saws are typically electric, with options ranging from corded tools powered by household current to advanced cordless models.
Some may view circular saws as more suited for rough carpentry, but in skilled hands, they are equally capable of delivering precise, clean cuts.
The key to achieving exceptional results lies in selecting the right blade type.
Circular saw blades come in three main categories:
- Ripping Blades: Designed for cutting wood lengthwise along or with the grain.
- Crosscut Blades: Ideal for making cuts across the wood grain.
- Combination Blades: Versatile options capable of both ripping and crosscutting tasks.
Choosing the appropriate blade depends on your specific project requirements.
For those on a budget, investing in a high-quality combination blade with carbide teeth can prove highly efficient.
Additionally, understanding blade diameters is essential.
Circular saw blades typically start at 7 ½ inches, with 10-inch blades being quite common, and 12-inch diameters available for large dimensional woodcutting.
Circular saws themselves come in two primary designs:
- Direct Drive Circular Saws: In this design, the blade is mounted at a 90-degree angle to the motor, directly on the arbor. Direct drive circular saws are the most prevalent and affordable option, making them suitable for various tasks.
- Worm Drive Circular Saws: These circular saws are built for heavy-duty work. They retain the same blade designs but feature a gear-driven blade arrangement, providing additional power for challenging cutting tasks.
b.) Jigsaw: The Artisan’s Curved-Cut Master
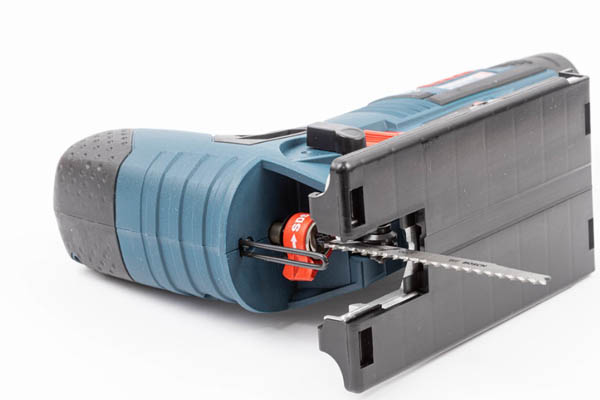
Every novice woodworker should invest in a reliable jigsaw.
Also known as saber saws, these electric power tools are designed for making intricate cuts, be they straight, curved, or serpentine.
Imagine the intricate patterns of a jigsaw puzzle, and you’ll understand the capabilities of this invaluable tool.
Jigsaws differ significantly from circular saws, relying on a back-and-forth or up-and-down motion to cut.
The blades used in jigsaws can vary in tooth count and composition, suitable not only for wood but also for cutting metal and plastic.
Fine-tooth blades excel at sawing veneers, while coarse-tooth blades are ideal for swift, rough work.
One notable advantage of jigsaws is their ease of use, allowing you to hold your workpiece securely with one hand while operating the tool with the other.
Jigsaws are particularly adept at cutting small, intricate pieces and are invaluable for tasks such as making interior cuts, including inner circles or rectangles.
By drilling a pilot hole and inserting the blade, you can even master plunge cuts with your jigsaw through practice.
c.) Compound Miter Saw: The Precision Angle Enthusiast
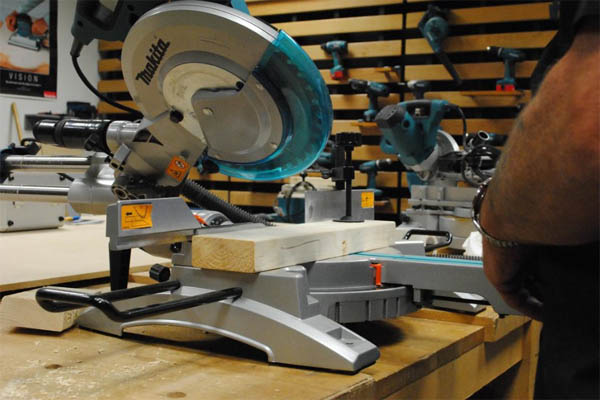
Compound miter saws represent a significant step up from standard circular saws.
They share similarities in blade types, using rip, crosscut, and combination blades similar to circular saws.
However, compound miter saws are mounted on an arm or track, reminiscent of the radial arm saws they’ve largely supplanted.
Common blade diameters for compound miter saws include 10 and 12 inches, although some models may accommodate the smaller 7 ½-inch size.
It’s crucial to employ high-quality crosscut saw blades for miter saws.
These electric saws are renowned for their versatility.
They’ve largely replaced traditional miter boxes and backsaws in many workshops due to their ability to deliver precise cuts for miters, bevels, and compound angles.
Compound miter saws can easily be adjusted to common angles like 22 ½, 45, and 90 degrees, and they offer the flexibility to cut at any angle in between, including left and right cuts.
Powered miter saws have evolved from standard cut-off or chop saws and are now available with sliding arms for extended cut lengths.
Additionally, their power heads can tilt in both directions, facilitating a combination of miter and bevel cuts.
With a compound miter saw, you can achieve virtually any series of angles required for your projects.
d.) Table Saw: The Workshop’s Backbone
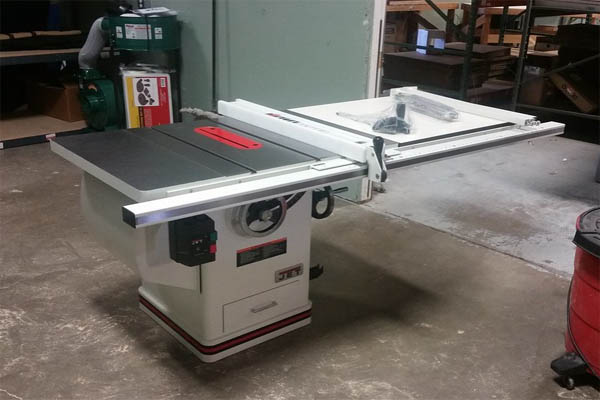
For most novice woodworkers, investing in a table saw early in their woodworking journey is a smart move.
Table saws offer the ability to make cuts that are challenging to achieve with other types of saws.
Structurally, table saws resemble an inverted circular saw, with the blade exposed from beneath the saw table or work surface.
These saws offer straightforward adjustments of blade depth and angles to ensure precision in your woodworking projects.
Table saws come in three primary versions, each suitable for beginners depending on the scale of their work and available space:
- Cabinet Table Saws: These robust saws are designed to remain stationary, making them ideal for all-purpose tasks, from lumber ripping to panel cutting. Many beginners opt for a cabinet table saw as the centerpiece of their workshop.
- Benchtop Table Saws: These compact and portable table saws are designed for lighter-duty work, making them a versatile choice for those who need to move between locations and store the tool conveniently. Most benchtop table saws feature direct-drive mechanisms and tend to produce more noise during operation.
- Contractor Table Saws: Contractor table saws are compact and convenient, making them favored choices for building contractors working on jobsites with limited space. They often feature wheels for easy transport and include extensions for added cutting support. Contractor table saws generally feature belt-drive mechanisms, which tend to be quieter than direct-drive alternatives.
Blade selection is critical when working with table saws. Common blades include combination, crosscut, and rip blades.
However, due to the table saw’s design, blades can be switched and adjusted quickly to suit your project’s needs.
Table saws often have standard blade diameters of 10 inches, although smaller options are available for benchtop models.
Table saws offer unparalleled precision for a wide range of cuts, from rip cuts (lengthwise along the grain) to crosscuts (across the grain).
They’re also invaluable for making dadoes (grooves across the grain) and rabbets (notches along the edge).
Some advanced table saws even support dado blade sets, enabling you to cut wider grooves for joinery work.
e.) Bandsaw: The Artistic Woodworker’s Ally
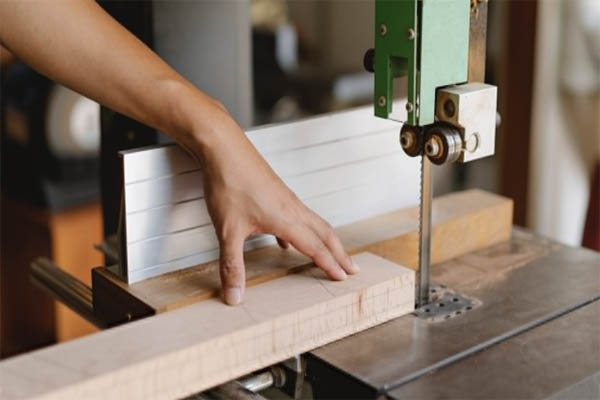
Bandsaws are the unsung heroes of the woodworking world, particularly for those with artistic inclinations.
They consist of a continuous band of blade tensioned between two wheels.
This design allows for intricate curved cuts, making bandsaws an indispensable tool for free-form woodworking, veneer cutting, resawing lumber into thinner pieces, and crafting intricate scrollwork.
Bandsaws come in various sizes, offering throat depths that determine the width of the stock you can cut.
For instance, a 14-inch bandsaw is a popular choice for general woodworking, while larger models provide more substantial capacities.
Blades for bandsaws are available in widths ranging from 1/8 to 1 inch, with tooth patterns suited for different cutting tasks.
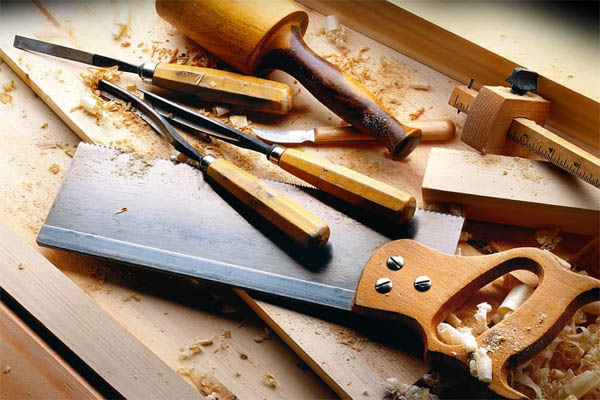
f.) Handsaws: The Traditionalist’s Choice

While power saws have revolutionized woodworking, traditional hand saws remain essential tools for beginners and professionals alike.
They are quiet, precise, and, when adequately sharpened, can produce cuts that rival their electric counterparts.
There are several types of handsaws, each designed for specific tasks:
- Rip Saw: These saws are optimized for cutting with the grain, producing quick and efficient cuts. Their teeth are filed to create chisel-like edges, allowing them to follow the grain’s natural direction.
- Crosscut Saw: As the name suggests, crosscut saws excel at cutting across the grain. They have smaller, finer teeth than rip saws and are designed to produce smoother cuts.
- Combination Saw: Combination saws, as the name implies, are versatile tools suitable for both ripping and crosscutting tasks. They offer a balanced compromise between the characteristics of rip and crosscut saws.
- Backsaw: Backsaws are smaller, more precise hand saws with reinforced steel or brass backs to prevent blade flexing. They come in various types, including dovetail saws, tenon saws, and carcass saws, each optimized for specific joinery tasks.
- Coping Saw: Coping saws feature a thin, narrow blade stretched across a metal frame. They are ideal for intricate curved cuts and are often used in tasks like coping joints.
- Dovetail Saw: Dovetail saws are specialized backsaws with fine teeth designed for cutting dovetail joints and other detailed joinery work.
- Keyhole Saw: Keyhole saws, sometimes called pad saws, feature a narrow blade with a sharp point, ideal for making interior cuts or starting holes in wood.
Selecting the right handsaw depends on the specific tasks you plan to undertake in your woodworking projects.
A basic set of rip and crosscut saws, along with a dovetail or coping saw for finer joinery work, is a good starting point for any beginner.
2. Tools for Filing, Planing, and Sanding:
After making rough cuts, you’ll need to refine and smoothen your wood pieces.
This is where finishing tools come into play. The core tools in this category include:
a.) Planes: Shaping and Smoothing Masters
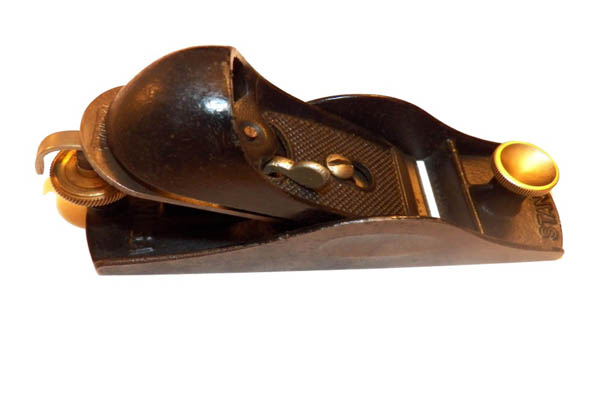
Planes are essential tools for any woodworker seeking precision. These hand tools function by slicing wood fibers, allowing for shaping and smoothing.
Planes come in various shapes and sizes, each designed for specific tasks. Here are some of the most common types:
- Jack Plane: Often the first plane in a woodworker’s collection, the jack plane is a versatile tool used for removing large amounts of wood quickly.
- Smoothing Plane: Smoothing planes are designed for achieving fine, smooth finishes on wood surfaces. They have a short sole and a finely set blade, perfect for final passes over your workpiece.
- Block Plane: These compact planes are great for smaller tasks, such as trimming edges or cleaning up end grain.
- Jointer Plane: Jointer planes are longer than jack planes and are used for straightening and flattening longer boards and edges.
- Router Plane: Router planes are specialized tools used for precise depth and groove work. They’re ideal for creating grooves, dadoes, and hinge mortises.
- Shoulder Plane: Shoulder planes excel at fine-tuning the shoulders of tenon joints and other joinery work.
- Spokeshave: Spokeshaves are versatile hand tools used for shaping and smoothing curved surfaces, such as chair legs or round tabletop edges.
When choosing a plane, consider factors like the intended use, the size of your projects, and your skill level.
It’s essential to keep your planes well-maintained, with sharp blades to ensure optimal performance.
b.) Orbital Sander: The Efficient Smoother

Sanding is an integral part of woodworking, and while hand sanding can be effective, an orbital sander can save you time and energy.
These power tools feature a sanding pad that moves in a circular or orbital motion, reducing the likelihood of leaving visible sanding marks on your workpiece.
Orbital sanders are easy to operate, making them an excellent choice for beginners.
They come in various sizes and sanding pad shapes, with the most common being the 5-inch random orbital sander.
This size provides a good balance between coverage and maneuverability. You can also find 6-inch and 3-inch models, each catering to specific needs.
When choosing sandpaper for your orbital sander, consider the grit rating.
Lower grits (around 40 to 60) are coarse and ideal for removing a significant amount of material or smoothing rough surfaces.
Higher grits (120 to 220) are finer and suitable for finishing work, providing a smooth surface ready for staining or finishing.
Orbital sanders often come with dust collection systems to minimize the mess in your workspace.
Some models also feature variable speed settings, allowing you to control the sanding aggressiveness.
To avoid over-sanding and damaging your workpiece, practice light and consistent pressure, and keep the sander moving while in operation.
c.) Hand Files: The Affordable Shapers
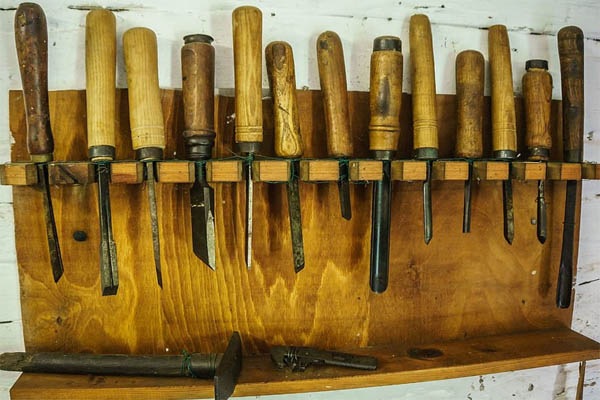
While sanders are great for smoothing large surfaces, hand files are essential for shaping and smoothing smaller, more intricate areas.
Hand files are versatile tools, used not only in woodworking but also in metalworking.
They consist of a steel bar with ridges or teeth along one or both sides, designed to remove material through abrasion.
Various types of hand files are available, each with unique characteristics:
- Rasp Files: Rasp files have individually cut teeth that are ideal for aggressive material removal. They are often used for shaping curved or irregular surfaces.
- Mill Files: Mill files feature closely spaced teeth for a smoother finish. They are suitable for both shaping and smoothing tasks.
- Half-Round Files: Half-round files have one flat and one curved surface, making them ideal for shaping convex and concave surfaces.
- Needle Files: Needle files are small, precision files with fine teeth, perfect for detailed work and finishing small parts.
When using hand files, apply even pressure and work in one direction to achieve the desired shape or finish.
Keep in mind that files can become clogged with material over time, so cleaning them with a file card or wire brush is essential to maintain their effectiveness.
3. Assembly and Joinery Tools:
Once you’ve cut and finished your wood pieces, it’s time to join them together.
This is where assembly and joinery tools come into play, allowing you to create sturdy and aesthetically pleasing connections.
The key tools in this category include:
a.) Hammer: The Universal Woodworker’s Friend
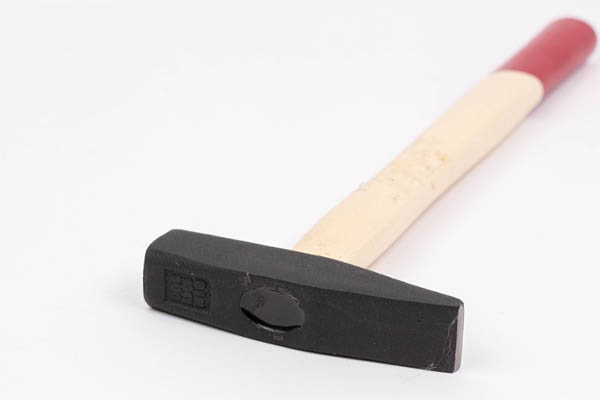
Hammers are indispensable in any workshop. They’re used for various tasks, including driving nails, adjusting joints, and even forming sheet metal.
When it comes to woodworking, the most common type of hammer is the claw hammer.
It features a flat, smooth face for striking and a curved claw on the back for removing nails.
Claw hammers come in various sizes and weights, so choose one that feels comfortable in your hand and suits your woodworking needs.
For delicate tasks, you might consider a smaller, lighter hammer, such as a tack hammer or a ball-peen hammer.
These hammers are ideal for tasks like driving small brads or setting dowels.
To avoid damaging your wood, use a softwood or hardwood block to cushion the impact when driving nails.
Additionally, consider using finish nails or brads with small, thin heads to minimize the appearance of nail holes in your projects.
b.) Mallet: The Gentle Persuader
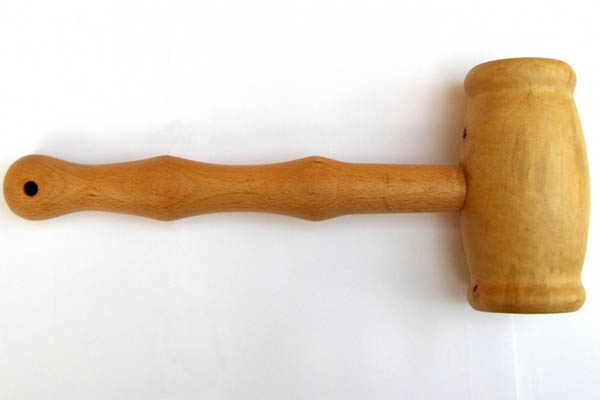
Mallets are a gentle alternative to hammers when you need to apply force without causing damage.
They’re typically used in woodworking for tasks like assembling joinery, seating chisels into wood, and tapping wooden parts together.
Woodworking mallets are made from various materials, including hardwood, softwood, rubber, and even plastic.
The choice of material depends on the specific tasks and personal preference.
Mallets come in different sizes and weights, so selecting one that feels comfortable in your hand is essential.
Keep in mind that using a mallet reduces the risk of denting or bruising your wood pieces, making it a valuable tool for joinery work.
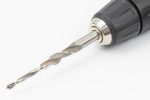
c.) Drill: The Hole Creator
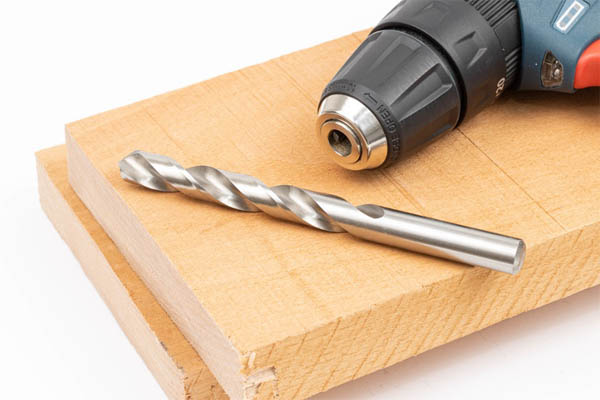
Drills are essential for creating holes in wood for various purposes, including attaching hardware, joining pieces together, and making holes for wiring or dowels.
There are two main types of drills used in woodworking: hand drills and power drills.
- Hand Drills: Hand drills are manual tools that require physical effort to turn the drill bit. They are simple, affordable, and perfect for beginners or for tasks where precision is critical.
- Power Drills: Power drills, also known as electric drills or cordless drills, offer the advantage of speed and convenience. They are available in corded and cordless versions and can be used with various attachments, including drill bits, hole saws, and sanding drums.
When selecting a drill, consider the type of work you’ll be doing.
If you need to make precise holes with control over the drilling speed, a cordless drill with adjustable speed settings is a good choice.
For heavy-duty tasks or continuous use, a corded drill with consistent power may be preferable.
c.) Screw Gun: The Fastener’s Best Friend
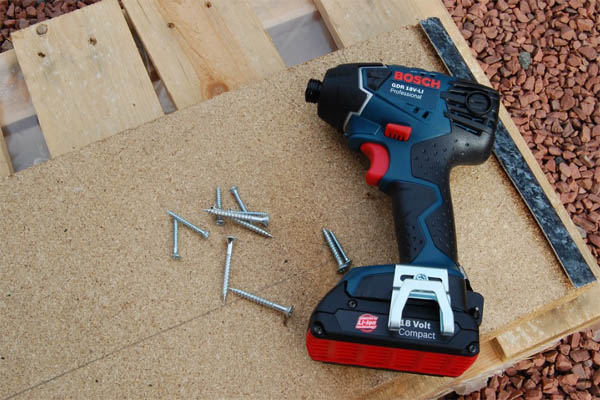
Screw guns are specialized power tools designed for efficiently driving screws into wood.
They are equipped with features such as adjustable depth settings and variable speed controls, allowing for precise screw placement and consistent screw depths.
These tools are particularly handy for tasks like assembling cabinets, building furniture, and securing plywood or MDF panels.
Screw guns often come with a nosepiece that accepts various screwdriver bit types, making them compatible with a wide range of screws, including Phillips, square-drive (Robertson), and Torx.
To ensure a secure hold, it’s essential to select the appropriate screw length and type for your project.
4. Measurement and Marking Tools:
Accurate measurement and marking are the foundations of successful woodworking.
The following tools will help you achieve precise results:
a.) Tape Measure: The Workhorse of Measurement

A reliable tape measure is a must-have tool for any woodworker.
It allows you to take accurate measurements for both length and width, crucial for planning your projects and ensuring that components fit together correctly.
When selecting a tape measure, consider the length of the tape and whether it has both metric and imperial (inch) measurements.
A 16-foot or 25-foot tape measure is a good all-around choice, providing sufficient length for most woodworking tasks.
Additionally, some tape measures feature standout capabilities, allowing the tape to extend several feet without collapsing, which can be useful for measuring long boards or wall lengths.
b.) Square: The Corner’s Best Friend
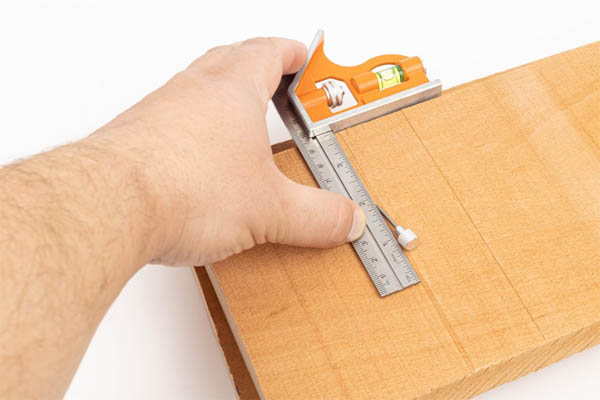
Squares are essential for checking the accuracy of your cuts, ensuring that your project components form precise right angles.
The combination square, featuring a ruler and an adjustable square head, is a versatile tool for measuring and marking.
You can use it to mark perpendicular lines, set blade and bit depths, and check the squareness of your work.
There are various types of squares designed for specific tasks:
- Try Square: This square is used for checking the squareness of edges and corners. It’s ideal for marking 90-degree angles on your workpiece.
- Carpenter’s Square: Also known as a framing or rafter square, this tool is larger and more robust. It’s designed for tasks like marking angled cuts and checking large structures for squareness.
- Combination Square: This versatile tool combines a ruler and a square head, allowing for various measurements and markings. It’s invaluable for precise woodworking tasks.
- Speed Square: Speed squares are triangular tools primarily used in framing and carpentry. They feature built-in angle guides for making quick measurements and marking angles.
c.) Marking Gauge: Precision in Your Hands

A marking gauge is a hand tool used for transferring measurements from a reference edge or surface to your workpiece.
It consists of a fence (beam) that can be adjusted to the desired measurement and a cutting or marking implement (often a wheel or a sharp point) that scribes a line on the wood.
Marking gauges excel at tasks like marking mortise and tenon joints, groove locations, and other joinery details with precision.
They ensure that your measurements are consistent and that your cuts align accurately.
5. Workpiece Support and Safety Tools:
A well-prepared workspace is crucial for safe and efficient woodworking.
These tools help you secure your workpieces and protect yourself during the woodworking process:
a.) Sawhorses: The Workshop’s Backbone
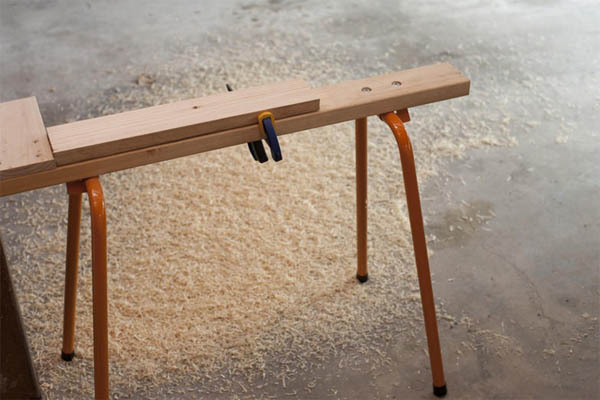
Sawhorses are essential for supporting your workpieces at a comfortable working height.
They provide stability and free your hands to focus on cutting, shaping, and assembling your wood.
Sawhorses come in various designs and materials, from traditional wooden ones to lightweight, foldable metal models.
When selecting sawhorses, consider their weight capacity and stability.
Ensure that they are sturdy enough to support the weight of the materials you’ll be working with, whether it’s small boards or large sheets of plywood.
Adjustable sawhorses are particularly useful for accommodating different workpiece sizes.
b.) Workbench: The Centerpiece of Your Workshop
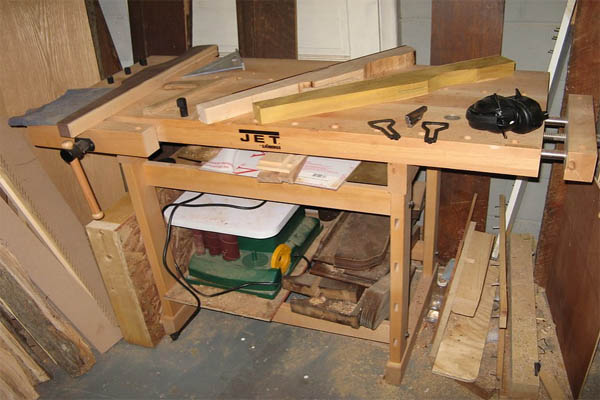
A quality workbench is the heart of any woodworking workshop.
It provides a stable, flat surface for a wide range of tasks, from cutting and planing to assembling and finishing.
A good workbench should be sturdy, durable, and the right height for comfortable use.
Many woodworkers choose to build their workbenches to suit their specific needs.
A traditional workbench typically consists of a thick, solid wood top supported by heavy wooden legs.
The top may have integrated vises and dog holes for securing workpieces during tasks like planing or joinery.
Alternatively, you can purchase pre-made workbenches in various styles to fit your workshop space and budget.
Safety Gear: Protecting Yourself
Safety should always be a top priority in woodworking. As a beginner, it’s essential to invest in the appropriate safety gear to protect yourself from potential hazards.
The following safety equipment is crucial:
- Safety Glasses or Goggles: Protect your eyes from dust, wood chips, and flying debris. Safety glasses or goggles with side shields provide the best protection.
- Hearing Protection: Power tools can be loud, potentially causing hearing damage over time. Wear earplugs or earmuffs to reduce noise exposure.
- Respirator or Dust Mask: Woodworking generates a significant amount of dust, which can be harmful if inhaled. Use a respirator or dust mask to filter out airborne particles.
- Dust Collection System: Whenever possible, use a dust collection system or shop vacuum to capture dust at its source and maintain a cleaner, healthier workspace.
- Work Gloves: Wear work gloves to protect your hands from splinters, sharp edges, and blisters.
- Apron or Shop Coat: An apron or shop coat can keep your clothing clean and provide additional protection.
- Push Sticks and Push Blocks: Use push sticks and push blocks to safely guide workpieces through power tools like table saws and jointers, keeping your hands a safe distance from moving parts.
- First Aid Kit: Keep a well-stocked first aid kit in your workshop for treating minor injuries.
- Fire Extinguisher: Have a fire extinguisher on hand in case of emergencies, and know how to use it.
- Safety Training: Consider taking a woodworking safety course to learn best practices and minimize the risk of accidents.
Now that you’ve been introduced to the essential woodworking tools, it’s important to understand how to use them safely and effectively.
Additionally, knowing how to maintain and care for your tools will extend their lifespan and ensure they perform optimally.
Let’s explore some essential tips for using and maintaining your woodworking tools:
Using Woodworking Tools Safely:
- Read the Manuals: Before using any power tool, carefully read the manufacturer’s manual to understand its features, functions, and safety precautions.
- Wear Appropriate Safety Gear: Always wear safety glasses or goggles, hearing protection, and respiratory protection when necessary.
- Maintain a Clean Workspace: Keep your workspace tidy by regularly removing wood chips, dust, and clutter to prevent tripping hazards and improve visibility.
- Secure Your Workpieces: Use clamps, vises, or other appropriate methods to secure your workpieces while cutting, shaping, or drilling to prevent unexpected movement.
- Keep Hands Away from Blades: Maintain a safe distance from cutting blades, and never reach over or behind a running saw or cutter.
- Use Push Sticks and Blocks: When operating power tools like table saws, jointers, or routers, use push sticks and blocks to guide your workpieces.
- Never Remove Guards: Keep all safety guards and devices in place on your power tools. Removing them can lead to accidents.
- Disconnect Power: When changing blades, bits, or making adjustments to your power tools, disconnect them from the power source to prevent accidental activation.
- Maintain Proper Posture: Stand or sit with your feet shoulder-width apart, maintain a firm grip on your tools, and use proper body mechanics to prevent strain or injury.
- Follow the Rule of Unplugged: Before making any adjustments to a tool, ensure it’s unplugged or its battery is removed.
Maintaining Your Woodworking Tools:
- Regular Cleaning: Clean your tools after each use to remove dust and debris. For power tools, consider using compressed air or a shop vacuum.
- Blade and Bit Care: Keep your saw blades, router bits, and other cutting tools sharp and clean. Dull blades can be dangerous and produce inferior results.
- Lubrication: Lubricate moving parts as recommended by the manufacturer to prevent rust and ensure smooth operation.
- Storage: Store your tools in a dry, climate-controlled area to prevent rust and damage. Hang hand tools or use toolboxes, and keep power tools on shelves or in cases.
- Replace Worn Parts: Regularly inspect your tools for worn or damaged parts and replace them promptly. This includes power cords, belts, bearings, and safety guards.
- Calibration: Check and recalibrate your measuring tools, such as squares and levels, to ensure accuracy.
- Sharpening: Invest in sharpening stones, jigs, or a professional sharpening service to maintain the sharpness of hand tools like chisels and planes.
- Battery Maintenance: If you use cordless power tools, follow the manufacturer’s recommendations for battery care, including charging and storage.
- Manuals and Documentation: Keep manuals and documentation for your tools in an easily accessible place for reference.
- Regular Inspection: Before each use, inspect your tools for loose parts, misalignments, or signs of wear and tear.
Remember that proper tool maintenance not only prolongs their lifespan but also ensures that they operate safely and efficiently, contributing to the quality of your woodworking projects.
Conclusion: Crafting Your Woodworking Journey
Woodworking is a deeply rewarding and creative pursuit that allows you to transform raw materials into functional and beautiful pieces.
With the right set of tools and a commitment to safety and craftsmanship, you can embark on a woodworking journey that evolves from novice to expert.
Starting with essential tools for cutting, finishing, assembly, measurement, and workpiece support, you’ll gradually expand your toolkit as your skills grow.
Woodworking is a craft that rewards patience and practice. It’s not just about the finished product; it’s about the process, the learning, and the satisfaction of bringing your ideas to life.
As you gain experience and confidence, you’ll discover new techniques, tackle more ambitious projects, and find your unique style as a woodworker.
So, set up your workspace, acquire the essential tools, and dive into the world of woodworking.
Whether you’re building furniture for your home, crafting intricate joinery, or simply creating art with wood, your woodworking journey awaits, filled with endless possibilities and the joy of craftsmanship.

Don Kerr spent many years honing his skills as a DIY woodworker. He finds immense joy in not only creating remarkable pieces but also in generously sharing his knowledge. Connect with him via group.