Hammer: The Essential Tool for Every Craftsman
A hammer is a hand tool that is typically used for driving nails, pins, or other fasteners into various materials, such as wood, metal, or masonry.
Hammers consist of a handle or shaft and a weighted head, which is often made of metal and has a flat or slightly curved striking face on one side and a claw or peen on the other side.
The striking face is used for delivering blows to the object being worked on, while the claw or peen is used for pulling out nails or other fasteners.
Types of Hammers
In woodworking, different types of hammers are used for specific tasks that require precision and care when working with wood.
Here are some common types of hammers used in woodworking:
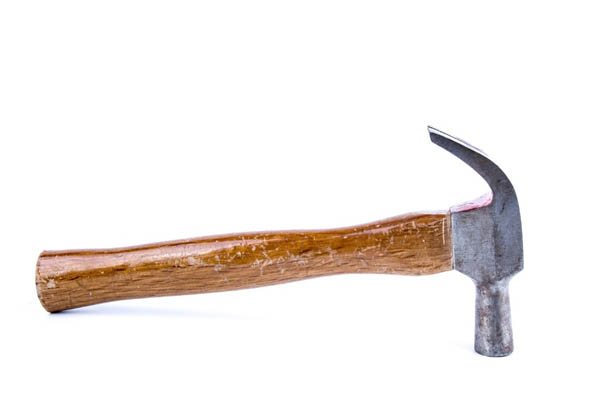
1.) Claw Hammer
The claw hammer is one of the most versatile hammers in woodworking. It has a flat striking face for driving nails and a curved claw on the opposite side for removing nails and prying apart wood joints. Claw hammers are essential for general woodworking tasks.
2.) Mallet
Mallets are typically made of wood, rubber, or plastic and have a large, flat head. They are used to deliver controlled, non-marring blows to workpieces, making them ideal for tasks like assembling joints, seating dowels, and carving.
3.) Dead Blow Hammer
Dead blow hammers have a hollow head filled with metal shot or sand. They provide a controlled and non-rebounding blow, making them suitable for delicate woodworking tasks where accuracy and minimal damage are essential.
4.) Joiner’s Mallet
A joiner’s mallet is a type of mallet with a wooden head designed for woodworking tasks like chiseling and mortise and tenon work. Its wooden head reduces the risk of damaging chisels and other tools.
5.) Carver’s Mallet
Carver’s mallets have wooden heads and are specifically designed for carving tasks. They are available in various shapes and sizes, allowing woodcarvers to choose the one that suits their carving style.
6.) Nail Set Hammer
Nail set hammers have a small, flat face and are used for driving nail heads below the wood’s surface without damaging the wood. They are especially useful when working with finishing nails.
7.) Japanese Wooden Mallet (Kanazuchi)
This traditional Japanese mallet is made of wood and is used in Japanese woodworking for various tasks, including joinery, assembly, and carving.
8.) Tack Hammer
Tack hammers have a dual head design, with a flat face for driving small nails and a magnetic face for holding tacks in place while driving them into wood.
9.) Rip Hammer
While not exclusive to woodworking, rip hammers are designed for framing tasks and heavy-duty woodworking. They have a straight claw, a heavier head, and are used for tasks like framing and rough carpentry.
10.) Screwdriver Hammer (Combination Hammer)
Some woodworking hammers come with a built-in screwdriver in the handle. They are handy for both driving screws and light hammering tasks.
When choosing a hammer for woodworking, consider the specific tasks you’ll be performing, the type of wood you’re working with, and your personal preferences.
Having the right hammer for the job can greatly improve your efficiency and the quality of your woodworking projects.
The Anatomy of Hammer
The anatomy of a typical hammer consists of several key components that work together to deliver controlled blows or impacts.
Hammers are essential tools in various applications, including woodworking, construction, and metalworking. Here’s a breakdown of the main parts of a hammer:
1.) Head
The head of the hammer is the metal part at the striking end.
It’s typically made of steel and is the part that delivers the impact to the workpiece. The shape of the head varies depending on the type of hammer.
2.) Striking Face
The striking face is the flat or slightly rounded surface on the head that makes direct contact with the workpiece.
It is the part of the hammer that transfers force to the material being worked on. In some hammers, such as claw hammers, one side of the face may be flat, while the other side is slightly curved.
3.) Peen
The peen is the part of the hammer head opposite the striking face. It can take various forms, depending on the type of hammer.
For example, in a ball-peen hammer, the peen is rounded, while in a cross-peen hammer, it is wedge-shaped. The peen is used for specific tasks such as shaping metal or starting nails.
4.) Claw
In hammers like claw hammers, one side of the head features a curved claw.
The claw is used for removing nails from wood by gripping and pulling them out. It can also be used for prying and splitting wood joints.
5.) Handle (Haft or Shaft)
The handle of the hammer is the long, usually wooden or fiberglass shaft that you hold. It provides leverage and control when swinging the hammer.
Handles come in various lengths and shapes, allowing for different grips and applications.
6.) Eye
The eye is the hole in the hammer head through which the handle is inserted. It secures the handle to the head, preventing it from separating during use.
7.) Face Diameter
The diameter of the striking face varies among hammers and determines the area of contact with the workpiece. Different face diameters are suited to different tasks and materials.
8.) Handle Grip
Some hammer handles have grips or cushioned areas to provide a more comfortable and secure hold, reducing hand fatigue and improving control.
9.) Handle End
The handle’s end, often called the butt, may be tapered or rounded, allowing for various hand positions and grip styles.
10.) Balance Point
The balance point is the point on the handle where the hammer is evenly weighted, allowing for better control and accuracy during use.
Understanding the anatomy of a hammer is crucial for selecting the right type of hammer for a specific task and for using it safely and effectively.
Different hammers are designed for different purposes, so choosing the appropriate one for your job is essential.
Applications of Hammers in Woodworking
Hammers are essential hand tools in woodworking, and they serve various purposes in different aspects of woodworking projects. Here are some common applications of hammers in woodworking:
1.) Driving Nails
One of the most common uses of hammers in woodworking is for driving nails into wood to join pieces together. Hammers, especially claw hammers, are invaluable for securing components like boards, trim, and framing elements.
2.) Removing Nails
Hammers with a claw or curved peen are used to remove nails from wood. The curved shape of the claw allows woodworkers to grip and pull out nails effectively without damaging the wood.
3.) Joinery
Hammers are used in joinery tasks such as mortise and tenon joints, dovetails, and other traditional woodworking techniques. They are used to tap or seat joints snugly for a precise fit.
4.) Assembly
Hammers are used to assemble furniture, cabinets, and other wooden structures by driving dowels, wooden pegs, or screws into pre-drilled holes. They ensure a secure fit and help align components.
5.) Panel Pins
When attaching thin pieces of wood or paneling, woodworking hammers are used to drive panel pins (small, slender nails) to secure the panels in place.
6.) Tacking
Tacking involves using hammers to drive small, lightweight fasteners, such as upholstery tacks or brads, into wood to attach fabric or other materials to wooden surfaces.
7.) Carving
In some woodworking styles, especially in carving, a small hammer or mallet is used to strike chisels and gouges for shaping wood and creating intricate details.
8.) Shaping and Smoothing
While not the primary tool for shaping and smoothing wood, hammers can be used with other tools, like chisels or carving gouges, to remove material or refine details.
9.) Splitting Wood
For tasks that require splitting wood, a wooden mallet or club hammer can be used in conjunction with a splitting wedge or chisel.
11.) Straightening and Adjusting
Sometimes, during assembly or fitting, wooden components may need adjustment. A woodworking hammer can gently tap and adjust parts to ensure they fit correctly.
12.) Scribing
Hammers can be used to scribe lines or marks on wood to guide cuts or other woodworking operations.
13.) Finishing Nails
For projects that require a more polished finish, woodworking hammers are used to drive finishing nails, which have smaller heads that can be easily concealed with wood putty or filler.
The choice of hammer and its specific application in woodworking depends on the task at hand, the type of wood being used, and the desired finish.
Different hammers, such as claw hammers, mallets, and joiner’s mallets, offer various advantages for specific woodworking tasks.
Proper Hammer Usage and Safety
Using a hammer safely and effectively in woodworking or any other task requires proper technique and attention to safety precautions.
Here are some guidelines for the proper usage and safety of hammers:
1.) Select the Right Hammer
Choose the appropriate type and size of hammer for your task. Different hammers are designed for specific applications, so make sure you’re using the right tool for the job.
2.) Inspect the Hammer
Before use, inspect the hammer for any damage, loose handles, or other issues. A damaged hammer can be dangerous and less effective.
3.) Maintain a Secure Grip
Hold the hammer securely near the end of the handle, with a firm but not overly tight grip.
Keep your wrist straight and aligned with your forearm to maintain control.
4.) Positioning
Stand in a stable position with your feet shoulder-width apart. Keep your body balanced and your non-dominant hand away from the striking area.
5.) Aim and Strike
Aim accurately at the target. Focus on hitting the target precisely. Avoid side angles or glancing blows, as they can lead to accidents or damage the workpiece.
6.) Swing with Control
Use controlled, accurate swings when striking. Avoid excessive force or erratic swings, which can result in accidents or imprecise hits.
7.) Use the Proper Stroke
Depending on the task, you may need to use a full swing for maximum force or a lighter tap for more delicate work. Adjust your stroke accordingly.
8.) Wear Safety Gear
When working on projects that produce flying debris or chips, wear safety goggles or a face shield to protect your eyes.
Safety Precautions
1.) Protect Your Hands
Consider wearing work gloves to protect your hands and improve your grip on the handle.
2.) Stay Focused
Avoid distractions and maintain full concentration on the task at hand when using a hammer.
3.) Secure the Workpiece
Ensure that the workpiece is securely clamped or held in place. This prevents it from moving unexpectedly when struck.
4.) Mind Your Surroundings
Be aware of your surroundings and ensure that there are no people or obstacles in your striking path.
5.) Control the Swing
Keep your movements controlled and avoid overbalancing or overreaching when using a hammer.
6.) Use a Vise or Clamp
If possible, use a vise or clamp to secure small workpieces. This keeps your hands away from the striking area.
7.) Keep Hammer Heads in Good Condition
Regularly check and maintain hammer heads to prevent them from becoming loose or damaged.
8.) Use Hearing Protection
When using a hammer for extended periods or in noisy environments, consider wearing hearing protection to safeguard your hearing.
9.) Store Safely
When not in use, store hammers in a safe and organized manner, away from children and others who may not be familiar with proper handling.
10.) Training
If you are inexperienced with hammers or using them for unfamiliar tasks, seek guidance or training from experienced individuals or professionals.
Maintenance and Care of Hammers
Proper maintenance and care of hammers are essential to ensure their longevity, performance, and safety.
Regular maintenance can prevent issues like handle damage, rust, and reduced striking efficiency. Here are some tips for maintaining and caring for your hammers:
1.) Keep It Clean:
- After each use, wipe the hammer head clean to remove any wood, metal, or debris that may have accumulated on the striking face.
- Remove any rust or corrosion with a wire brush or sandpaper. Apply a rust inhibitor or oil to prevent further rusting.
2.) Check the Handle:
- Inspect the handle regularly for signs of damage, such as splinters, cracks, or looseness. A damaged handle should be replaced promptly.
- Tighten loose handles by driving wooden wedges into the eye of the hammer or securing them with epoxy or a similar adhesive.
3.) Lubricate Moving Parts:
- If your hammer has a moving part, such as a ball-peen hammer or a hatchet, lubricate it regularly to ensure smooth movement and prevent rust.
4.) Store Properly:
- Store your hammers in a dry environment to prevent moisture from causing rust or handle deterioration. Hanging them on a pegboard or tool rack is a good way to keep them organized and accessible.
- Consider using a tool chest or toolbox to protect your hammers from dust and humidity.
5.) Maintain Balance:
- Check for proper balance by holding the hammer vertically with your index finger just below the head. It should balance without tipping toward the head or handle.
- If the balance is off, it may affect the accuracy and control of your strikes. Adjust the balance if necessary by adding or removing weight from the head.
6.) Protect the Striking Face:
- Avoid using the hammer to strike surfaces that are harder than the hammer’s head, as this can damage the striking face and reduce its effectiveness.
- Use a soft-faced hammer or mallet when necessary to avoid damaging the striking face of your hammers during certain tasks.
7.) Prevent Handle Splinters:
- Sand the handle regularly to maintain a smooth surface. This prevents splinters and enhances grip.
- Apply a finish or sealant to the handle for additional protection and comfort.
8.) Regularly Inspect Fasteners:
- Check any fasteners, such as screws or wedges, for tightness regularly to ensure that the head remains securely attached to the handle.
9.) Replace Damaged Parts:
- If you notice severe damage to the handle or head, replace the damaged parts or consider purchasing a new hammer. Do not attempt to use a compromised tool, as it can be unsafe.
Conclusion
Hammers are timeless tools that continue to play a pivotal role in craftsmanship, construction, and various DIY projects.
Whether you’re a professional tradesperson or a passionate DIY enthusiast, understanding the different types of hammers, their applications, and the importance of proper usage and maintenance will help you harness the full potential of this essential tool.
A well-chosen and well-maintained hammer will not only make your work more efficient but also stand as a symbol of craftsmanship’s enduring legacy.

Don Kerr spent many years honing his skills as a DIY woodworker. He finds immense joy in not only creating remarkable pieces but also in generously sharing his knowledge. Connect with him via group.

