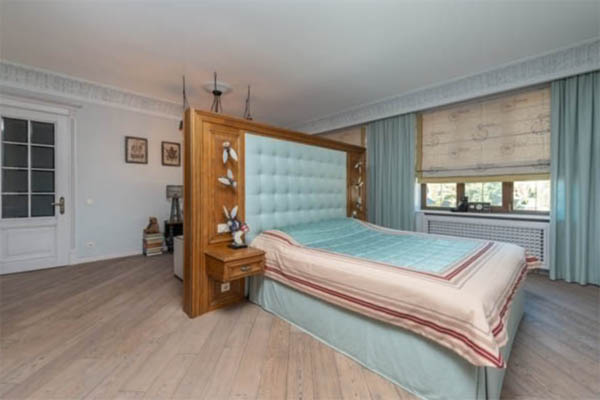
How to Create a Custom DIY Wood Headboard
Designing and crafting a rustic wood headboard is a satisfying and enjoyable DIY project that allows you to infuse your bedroom with personal charm.
Through this DIY headboard tutorial, you’ll learn how to make a headboard tailored to your preferences, from the choice of wood plank to the staining process, ensuring a perfect fit for your bed frame and space.
This comprehensive guide covers every step, including planning, wood selection, precise cutting, thorough sanding with sandpaper, and expert finishing, to create a stunning wood headboard that will seamlessly enhance your bedroom’s aesthetic.
Create a Custom Wood Headboard (DIY Headboard)
1.) Planning Your Custom Wood Headboard
Before diving into the construction process, careful planning is crucial. This initial step ensures that your headboard project will be a success.
Here are some key considerations:
a. Size and Design: Measure the width of your bed to determine the appropriate size for your headboard. Decide on the design style that suits your bedroom decor, whether it’s a classic rectangular shape, an elegant arched top, a rustic barnwood look, or a more intricate pattern.
b. Functionality: Think about the functionality of your headboard. Do you want it to have built-in storage, shelves, or compartments? Planning these features ahead of time will help you select the right materials and make necessary adjustments in your design.
c. Budget: Establish a budget for your project, which will influence your choice of wood and finish. Custom wood headboards can be as affordable or as extravagant as you want, depending on the materials you select.
d. Tools and Safety: Identify the tools you’ll need for this project, including a miter saw, clamps, sandpaper, wood glue, and safety gear such as goggles and gloves.
2.) Choosing the Right Wood
Selecting the appropriate wood is a critical decision that impacts the look, feel, and durability of your headboard.
Here are some popular wood options:
a. Pine: Pine is a cost-effective choice and is easy to work with, making it suitable for beginners. It has a light color and straight grain pattern that takes stains and paints well.
b. Oak: Oak is known for its durability and timeless appearance. It comes in red oak and white oak varieties, with red oak being more porous and easier to stain, while white oak has a finer grain and is well-suited for a natural finish.
c. Maple: Maple wood has a fine, even grain pattern and takes finishes beautifully. It’s an excellent choice for a headboard that you plan to paint.
d. Plywood: Plywood is a versatile option, offering a smooth, uniform surface that is ideal for painting. It’s also more affordable than solid wood.
e. Exotic Woods: If you’re looking for something unique, consider exotic woods like mahogany, cherry, or walnut. These woods often have striking colors and grain patterns, making them perfect for a statement headboard.
3.) Cutting Your Wood
Once you’ve settled on your design and selected the wood type, it’s time to cut the wood to the desired size and shape.
Proper measurements and precise cuts are essential for a professional-looking headboard. Here’s how to do it:
a. Measure Twice, Cut Once: Double-check your measurements before making any cuts. Remember that your headboard should be slightly wider than your bed for a balanced look.
b. Using a Miter Saw: If you have access to a miter saw, it’s the best tool for making accurate cuts. Set the saw to the appropriate angle and make your cuts slowly and steadily.
c. Hand Saw: If you don’t have a miter saw, you can use a hand saw. Ensure that your lines are straight, and cut carefully to avoid splintering the wood.
4.) Sanding for a Smooth Finish
After cutting your wood pieces, you may notice rough edges or surfaces. Sanding is a crucial step to create a smooth and polished finish. Follow these steps for sanding:
a. Select the Right Sandpaper: Start with a coarse-grit sandpaper (around 80-100 grit) to remove any imperfections, and then progressively move to finer grits (e.g., 150-220 grit) for a smoother finish.
b. Sand Evenly: Sand the entire surface of your wood pieces evenly, paying extra attention to edges and corners. Sanding by hand or with an orbital sander is effective.
c. Clean Thoroughly: After sanding, wipe down the wood pieces with a damp cloth to remove any dust or debris. Allow them to dry completely before moving on to the finishing step.
5.) Choosing the Right Finish
Choosing the right finish for your custom wood headboard is essential for both aesthetics and protection. Here are some popular finish options:
a. Stain: Staining your wood enhances its natural color and grain. It’s an excellent choice if you want a rustic or classic look. Remember to test the stain on a small, inconspicuous area before applying it to the entire headboard.
b. Paint: Painting your headboard allows you to match it to your bedroom’s color scheme. It’s versatile and can work with various design styles.
c. Clear Coat: Applying a clear polyurethane or varnish can give your headboard a protective and glossy finish while preserving the wood’s natural beauty.
d. Distressing: For a vintage or rustic appearance, consider distressing your headboard with techniques like sanding, chipping, or staining to create a weathered look.
e. Oil Finish: Using oil-based finishes like tung oil or linseed oil can provide a deep, rich appearance and protect the wood from moisture and wear.
f. Combining Finishes: You can also get creative by combining different finishes to achieve a unique look. For example, you might stain the main body of the headboard and paint the trim.
6.) Assembling Your Custom Wood Headboard
To ensure the strength and stability of your headboard, proper assembly is crucial. Follow these steps to securely connect the wood pieces:
a. Wood Glue: Apply wood glue to the edges of the wood pieces that need to be joined together. Use a brush or a small roller to evenly spread the glue.
b. Clamps: Clamp the pieces together tightly. This step is essential to create a strong bond. Make sure the clamps are evenly distributed along the seams.
c. Drying Time: Allow the glued pieces to dry for the recommended time specified on the wood glue’s label. This usually takes several hours or overnight.
d. Reinforcement: For added strength, you can use screws or dowels to reinforce the joints. Pre-drill holes to prevent splitting, and countersink the screws for a flush finish.
7.) Adding Special Features
Customizing your wood headboard can make it truly unique. Here are some special features you can consider:
a. Built-In Lights: To create a cozy ambiance in your bedroom, you can incorporate built-in LED lights or sconces into your headboard. Ensure that you have a plan for wiring and access to power sources.
b. Upholstered Panels: For added comfort and a touch of luxury, consider upholstering parts of your headboard. Choose a fabric that complements your decor and attach it securely.
c. Decorative Accents: Enhance the visual appeal of your headboard by adding decorative elements like metal accents, carvings, or stenciled designs. These details can give your headboard a unique and personalized touch.
d. Storage Compartments: If you need extra storage space, you can create hidden compartments or shelves within your headboard design. These can be perfect for books, magazines, or small decor items.
8.) Attaching Your Custom Wood Headboard
Now that your custom wood headboard is complete, it’s time to install it securely in your bedroom. The method of attachment will depend on your specific design and whether you want it mounted to the bed frame or the wall.
a. Bed Frame Mounting: If you plan to attach your headboard to the bed frame, use brackets or bolts to secure it in place. Make sure it’s level and stable to prevent accidents.
b. Wall Mounting: To mount your headboard on the wall, consider using French cleats, brackets, or a wall-mounted headboard system. Ensure that it’s anchored securely to the wall studs for stability.
c. Adjustments: Make any necessary adjustments to ensure the headboard is level and centered above the bed. Check for stability and make sure it’s firmly attached.
Conclusion
Creating a custom wood headboard is a rewarding DIY project that allows you to showcase your creativity and woodworking skills while enhancing the aesthetics of your bedroom.
By carefully planning your design, selecting the right wood, making precise cuts, sanding meticulously, choosing the perfect finish, and adding special features, you can craft a headboard that complements your decor and meets your functional needs.
Proper assembly and secure attachment ensure both the beauty and safety of your custom wood headboard.
Enjoy the satisfaction of having a one-of-a-kind piece that transforms your bedroom into a cozy and stylish retreat.
Whether your style is rustic, modern, or somewhere in between, your custom wood headboard will be a unique expression of your personal taste and craftsmanship.

Don Kerr spent many years honing his skills as a DIY woodworker. He finds immense joy in not only creating remarkable pieces but also in generously sharing his knowledge. Connect with him via group.

