How to Make a Wine Rack from a Wood Pallet (Pallet Wine Rack)
Wine enthusiasts understand the importance of proper wine storage. While there are various options available, crafting your own wine rack from a wooden pallet can be an exciting and budget-friendly DIY project.
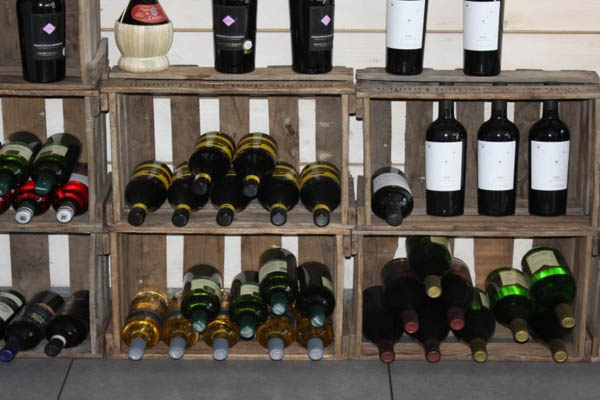
Not only does it provide an elegant way to display your cherished wine collection, but it also adds a rustic touch to your home decor.
Crafting a wine rack from pallet wood involves using basic tools like a drill and additional boards to create a unique and rustic storage solution for your cherished wine collection.
In this comprehensive guide, we will walk you through each step of creating a wine rack from a wood pallet, ensuring you achieve a beautiful and functional addition to your living space.
Wine Rack from a Wood Pallet: A Stylish & Easy DIY Project
1. Cut the Pallet to Size
The foundation of your wine rack lies in selecting the right wooden pallet and shaping it to your requirements.
To begin, you’ll need to choose a pallet that’s in good condition, free from splinters, and sturdy enough to support your wine bottles.
The standard height for a wine rack is typically between 32 to 36 inches, which allows ample space for accommodating wine bottles of various sizes.
Fortunately, pallets are often the perfect width for holding wine bottles, so you can leave the width as it is.
Using a circular saw, carefully trim the pallet to your desired height. Before cutting, measure and mark the pallet accurately to ensure a clean and even finish.
Safety should always be a priority when working with power tools, so don’t forget to wear protective gear such as safety goggles and ear protection.
2. Expose the Curve
One of the distinctive features of a wood pallet wine rack is the exposed curve. To achieve this design element, you’ll need to remove the center planks from the pallet.
These planks often hide the natural curvature of the wood and contribute to the rustic aesthetic of the finished product.
Use a pry bar or a hammer to gently remove the center planks while taking care not to damage the surrounding structure.
This step will reveal the graceful curve of the wood, which will become a visually appealing aspect of your wine rack.
3. Remove Excess Planks
After exposing the curve, it’s time to remove any excess planks that might interfere with the desired size and shape of your wine rack.
The goal is to have a clean, open frame that accommodates your wine bottles and glasses comfortably.
Carefully inspect the pallet and identify any planks that need to be removed. Utilize your pry bar or hammer to detach them, ensuring that you maintain the structural integrity of the pallet.
This process may require some patience and finesse, but the end result will be well worth the effort.
4. Sand the Pallet
With the excess planks removed, it’s time to refine the surface of your wine rack by sanding it down.
Sanding serves multiple purposes, including the removal of rough edges, splinters, and imperfections, as well as preparing the wood for staining or painting.
Begin with coarse-grit sandpaper to tackle any noticeable imperfections or rough spots. As you progress, switch to finer-grit sandpaper to achieve a smoother finish.
Be thorough in your sanding to ensure a polished and inviting texture for your wine rack. Dust off any wood shavings and debris to prepare for the next steps.
5. Cut the Wine Bottle Holders
The wine bottle holders are a crucial component of your wine rack, as they provide individual slots to securely store each wine bottle.
To create these holders, you’ll need 2×4 pieces of wood cut to the desired length. The length of the 2x4s should match the width of your pallet.
For an added touch of elegance, consider rounding the front edges of the 2x4s using a jigsaw.
This subtle curve not only enhances the visual appeal but also ensures that your wine bottles slide in and out smoothly.
6. Attach the Wine Bottle Holders
Position the 2×4 wine bottle holders vertically on the pallet. Ensure that they are evenly spaced and level to create a symmetrical and balanced appearance.
Secure the holders to the pallet using screws or nails, making sure they are firmly attached.
Each holder should snugly accommodate a wine bottle, providing a secure and stylish storage solution.
7. Add a Glass Holder
To maximize the functionality of your wine rack, consider adding a glass holder to the bottom section.
This addition allows you to store wine glasses conveniently alongside your wine bottles, creating an all-in-one wine station.
Measure and cut a piece of wood to the desired length for the glass holder. Attach it securely to the bottom of the wine rack using screws or nails.
Ensure that the glass holder is well-supported to handle the weight of the glasses. This thoughtful addition makes it easy to access your stemware while keeping everything organized.
8. Stain or Paint the Wine Rack
With the construction of your wine rack complete, it’s time to add a finishing touch that aligns with your decor preferences.
You can either stain the wood for a classic rustic look or paint it in a color that complements your interior design.
Staining the wood enhances its natural beauty while giving it a protective layer. Choose a stain that suits your style and follow the manufacturer’s instructions for application.
Alternatively, if you opt for paint, select a color that matches your decor or adds a pop of personality to your space. Allow sufficient drying time between coats to achieve a flawless finish.
9. Hang the Wine Rack
Now that your wood pallet wine rack is crafted and customized to perfection, it’s time to display your masterpiece. Proper installation is crucial to ensure the stability and safety of your wine rack.
Determine the ideal location for your wine rack on the wall. Use a level to ensure that it’s perfectly straight.
Depending on the weight of your wine rack and the type of wall you have, choose appropriate screws, anchors, or hooks for installation.
Carefully attach the wine rack to the wall, making sure it is securely fastened and can support the weight of the wine bottles and glasses.
Conclusion
Creating a wine rack from a wood pallet is a rewarding DIY project that combines functionality and aesthetics.
This comprehensive guide has taken you through each step of the process, from selecting the right pallet to adding the finishing touches.
By following these instructions, you can transform an ordinary pallet into a unique wine storage solution that not only showcases your wine collection but also adds a touch of rustic charm to your living space.
As you hang your handcrafted wine rack and fill it with your favorite wines and glasses, you’ll not only enjoy the practical benefits of organized wine storage but also take pride in the beautiful piece of functional art you’ve created.
Cheers to your newfound woodworking skills and to many delightful evenings spent savoring the fruits of your labor!

Don Kerr spent many years honing his skills as a DIY woodworker. He finds immense joy in not only creating remarkable pieces but also in generously sharing his knowledge. Connect with him via group.

